As we get closer to Field Day 2017 and the summer VHF contest season I decided it was time to build (or in my case find) a serial port keying interface to use between the logging computer and the radio.
Back in the early 2000’s I was active on 144 MHz EME (Earth Moon Earth) with around 700W and a 4 square of CC13B2 from grid FN54. It was a quickly thrown together station with the preamp in the shack, but it worked and got me on the air, working several countries and stateside stations. JT65 and high speed meteor scatter software was just starting to be developed, so 99% of the moon bounce activity was still good old CW.
Transmit CW for a minute, receive for a minute until the QSO was completed. I had built a small CW interface between my Texas Instruments laptop (running Windows 95) to the FT-847 radio. This would allow me to pre-program my CW sequences and with a function key select the right sequence and transmit them for the 1 minute cycles. I was using the old Log-EQF software (DOS version), to handle sending the CW and I remember that whenever I would open a new window or a new program on the laptop when I was sending, the CW I was sending would S L O W down as the computer processor was being tasked to do other things. Ha! I quickly made a point to not do anything else on that computer when it was sending CW.
So, after tearing down the EME station and moving 3000 miles across the country, the interface I built got tucked away somewhere “safe” (you all know what that means), and I moved out of Maine and into Arizona.
Flash forward to 2017 and the preparation for Field Day 2017 with the Queen Creek group. In 2016 we did real well compared to the previous years, however, we quickly discovered that we need to focus on CW if we want to place higher in the event. One solution that will help new CW operators is to have a CW interface from the logging computer, so they do not have to send with a key, but rather listen, and type the call sign of the station calling into the software and let the logging software call/ reply to the station. Pretty slick, and it takes away a lot of the stress from the new CW operator from having to worry about having a “poor fist”.
So, if you want to do this, what options do you have?
Plenty!
- N4CCB has a great page on building your own interface based upon the schematics found on the N3FJP logging software website.
- W3YY has a very slick interface that is optically isolated.
- N1MM logging software provides a quick and dirty interface with only 2 parts.
- A Google image search for “serial CW interface” gives you plenty of options as well.
- Or – find the interface you tucked away in a “safe place” 17 years ago!!
Back in my EME days, I went with the quick and dirty interface that was shown on the N1MM page.
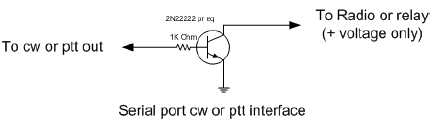
Very cheap and quick build option for CW keying.
This is to be used with a DB9 serial port on the computer, or with a USB to serial adapter, The pins of the serial port is used to drive a 2N2222 or BC547 transistor for keying.
– 1K resistor from serial port pin to Base of the 2N2222
– Emitter to ground (or maybe through a current limiting resistor)
– Collector to TX line of radio
Another option that uses both the RTS and DTR pins (one for PTT, the other sending CW) is here. Same design, just a bit cleaner in the diagram. This way one set of pins can send CW, another can key the transmitter to send voice of RTTY or some other mode, all in the same serial DB9 connection.
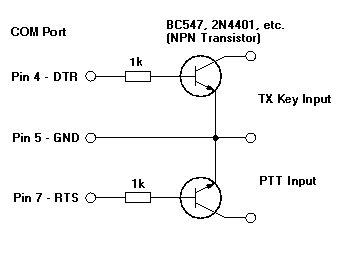
- pin 7 for DTR keying
- pin 5 for ground
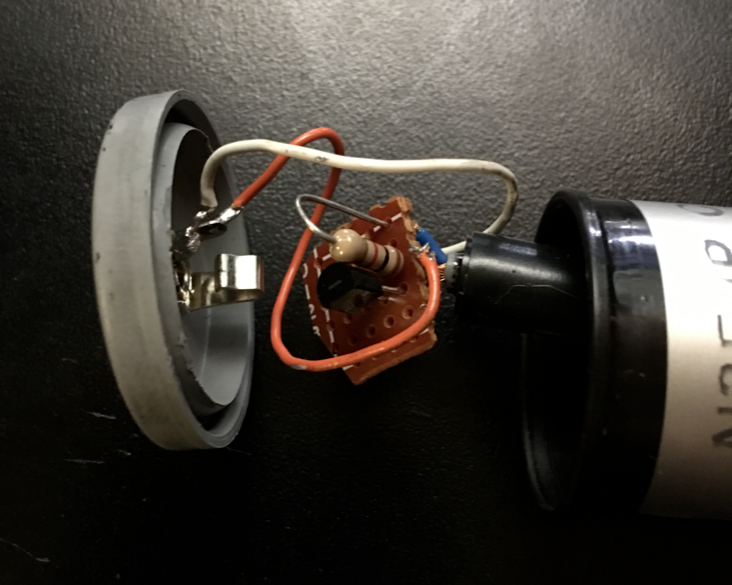
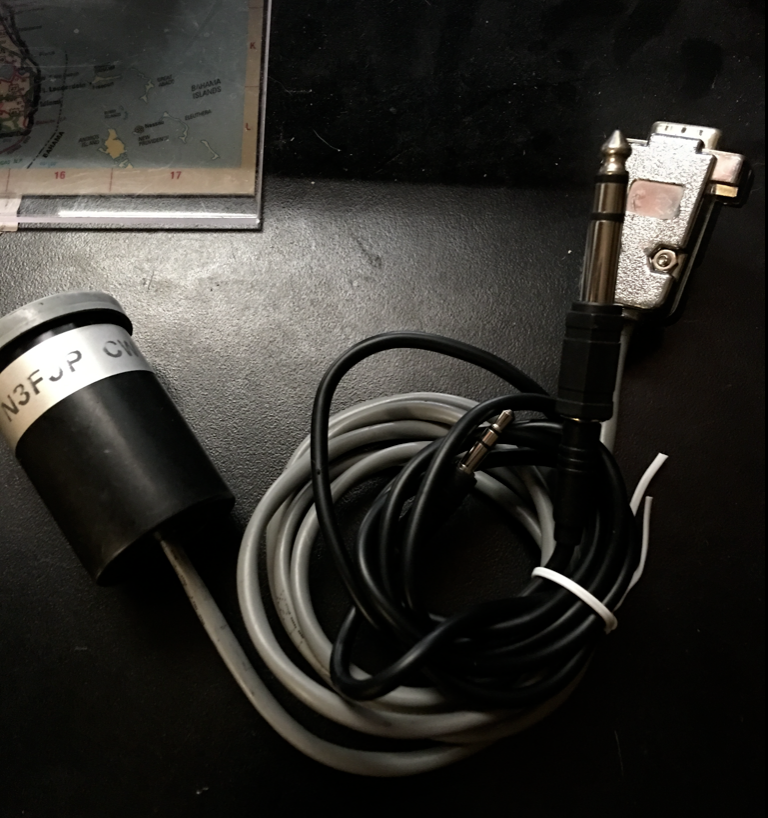
Then make the interface. I went super ugly style and put it on a small perf board, and stuck it all in an old 35mm film container. #Vintage
From there, I added a 3.5mm stereo jack to connect the 3.5mm stereo to stereo cable that would then connect to my FT-817 or FT-857, as both have the smaller 3.5mm keying jack.
- Connect the DB9 serial circuit to the computer
- Make sure the computer is already booted up and running, or as you boot up your computer it will key your radio off and on several times!
- Set the radio to “straight key” mode, which is done by turning OFF the keyer function in the radio (This circuit will only work with the internal CW keyer set to OFF)
- Plug in the cable to the radio
- Tell the software what COM port and select either RTS or DTR depending on how you wired it
- Go! Type away and send CW- all via the computer
john johnson October 20, 2021
Any idea if this would work on a Kenwood TS830S,
N1AV October 20, 2021 — Post Author
Greetings John, I do not see why it would not work. The 830 might require a mono cable vs a stereo cable for your CW line connection, but the manual should have that info. If you go to the AClog webpage, he has additional information on keying circuits to use with loggers.
https://www.n3fjp.com/cwschematic.html