CQ field day – CQ field day
N7Q – Nancy Seven Queen – FIELD DAY!
I took part in the Queen Creek ARC 2016 Field Day exercise this year and had a blast. For the past several years the QC ARC has been looking for a location for Field Day. They have setup in local parks, in local EMA offices, and now on the Mongollon rim. Several members of the QC ARC have been coming to the ‘Rim’ for portable events, using the special event call sign N7Q. This year, it was decided that Field Day would be on the rim, and I knew I wanted to take part.
As the event grew closer, it looked like life was getting in the way of may of the club members, as other commitments were showing up for the Field Day weekend. At the same time the Cedar Creek fire near Show low was attracting a lot of attention. The good thing was that the fire was moving east, and we were well west of the location. As we looked to the SE, you could see the haze from the fire off in the distance, but our location was never in any danger. A couple of days before the weekend, numbers were dropping even more. However, few of us pressed on, packed up and headed up the hill to take part in the event. In all, 5 licensed operators Greg- KI7BFN, Dennis-KF7RYX, Dave- KG7NCV, Michelle- KG7NCW and myself took part in the event, along with a few unlicensed guests and a few visitors.
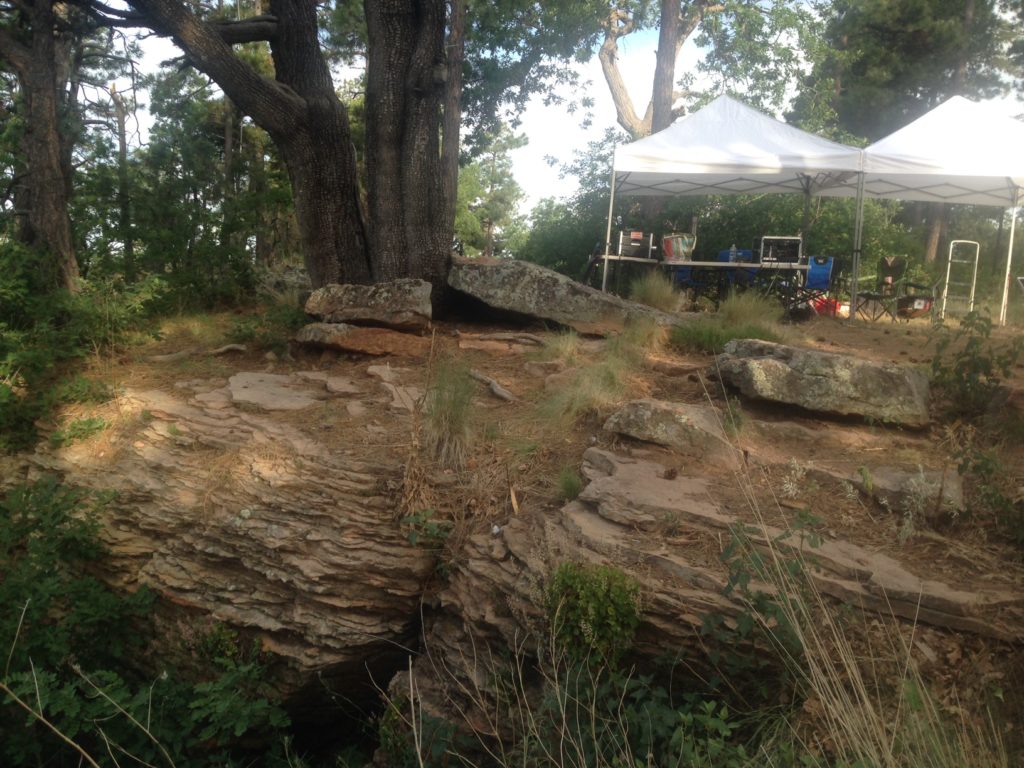
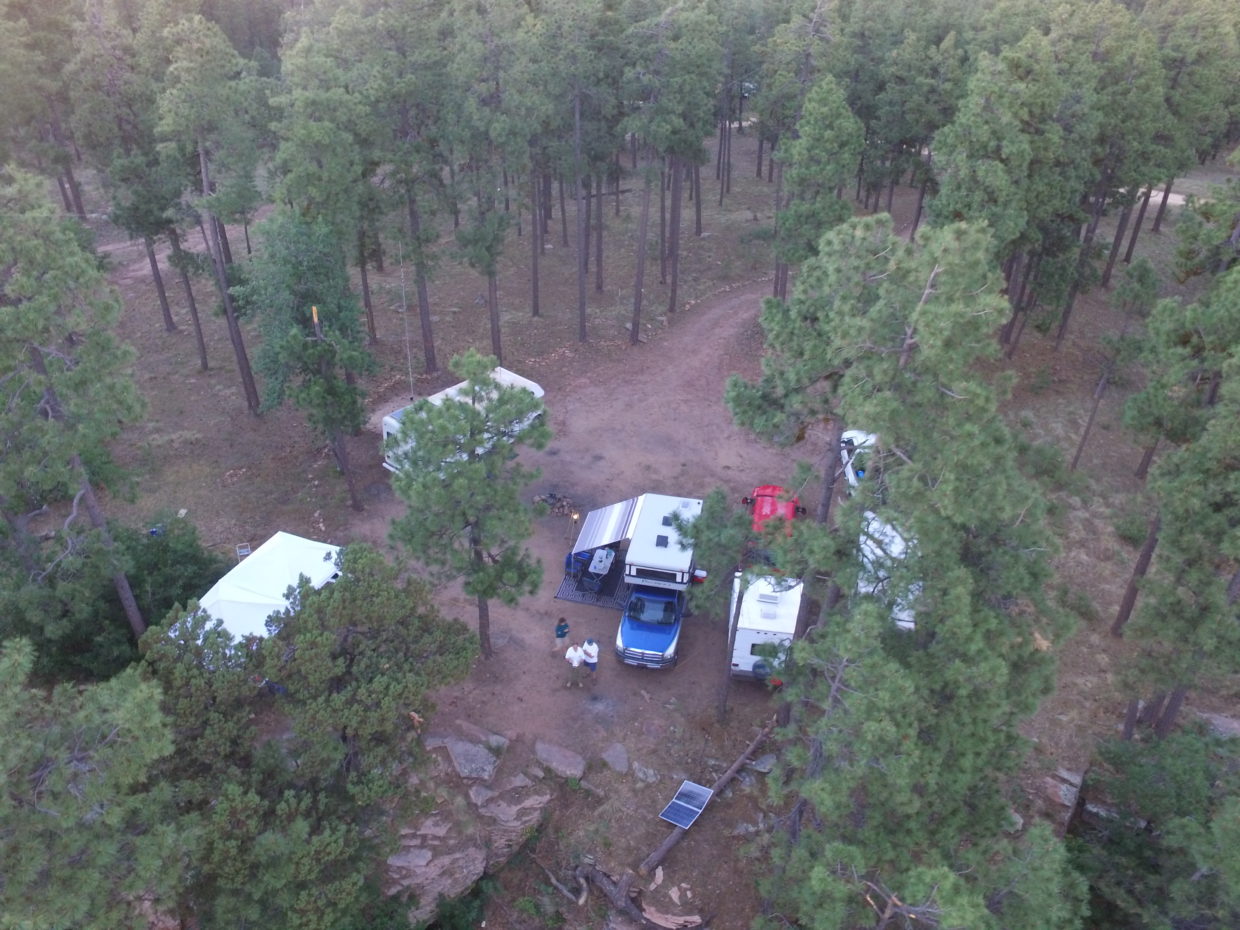
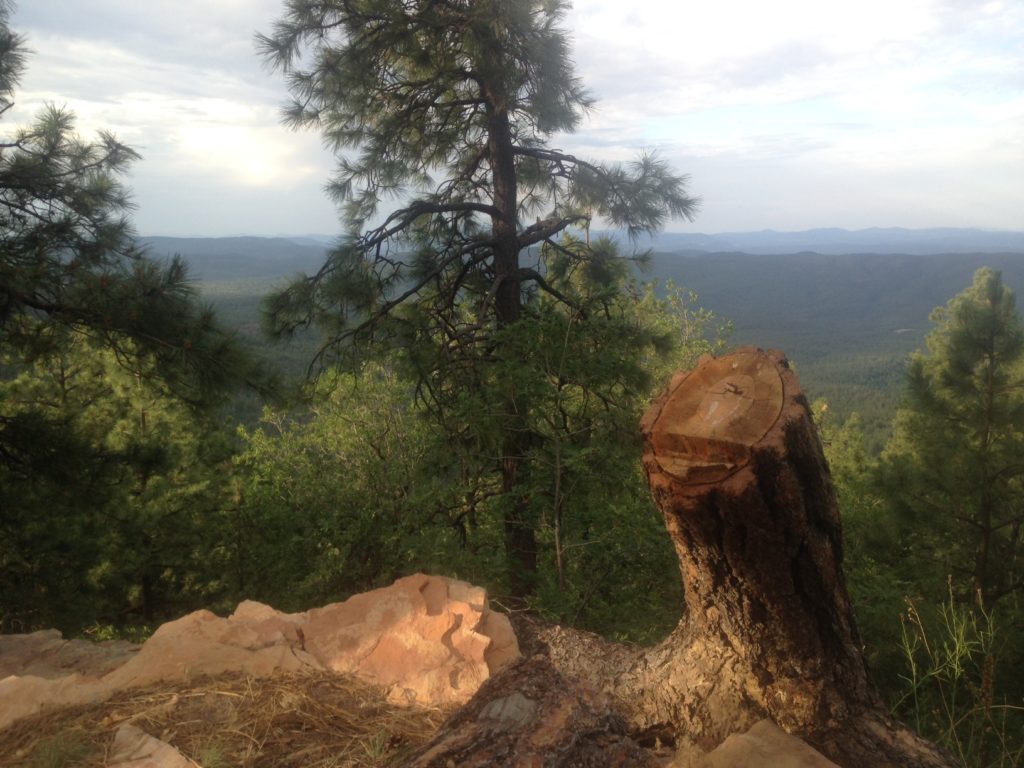
When we say “We are located on the edge of the rim…” We mean it!
FIELD DAY Operations
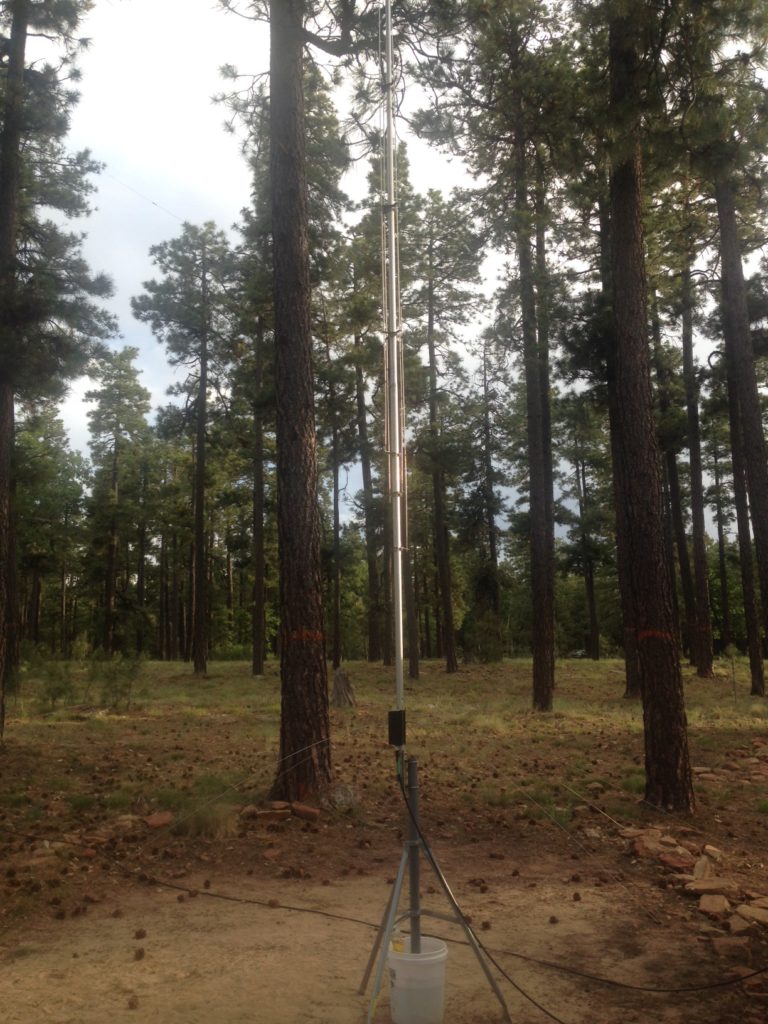
This year, 2016, N7Q operated as a “2 Alpha” station, which meant that we would be operating two HF stations simultaneously during the event. We did have a GOTA station as well as a VHF station – however, we didn’t have the level of activity that we hoped for on those stations. (Maybe next year we could go 3A pull in some CW guys and skip the GOTA) In order to keep the receivers quiet during the event we ordered several W3NQN band pass filters from Array Solutions several months before FD. They provided for a PERFECT solution for our stations. I never heard any noise (well, on the radio!) from the other N7Q station, and likewise from them to me. They are pricey, but WELL worth the funds if you ever plan on operating in a dense RF environment with other stations on at the same time. With antennas that need to be tuned, you need to make sure that you place the filter after the radio but BEFORE the tuner. This will ensure that you are not transmitting high SWR into the filter that could damage it. Ideally, a switching system should be implemented, based upon the band data jack on the back of the radio to select the correct filter. Even a manual switching system would work. However, due to time, we went with the “old school” method of removing one filter, then replacing with the band that you want to work. It took a few minutes, but something I had to leave notes for myself to pay attention to as I would be doing this in the wee hours of the morning going from 20 to 80 meters and back to 20m.
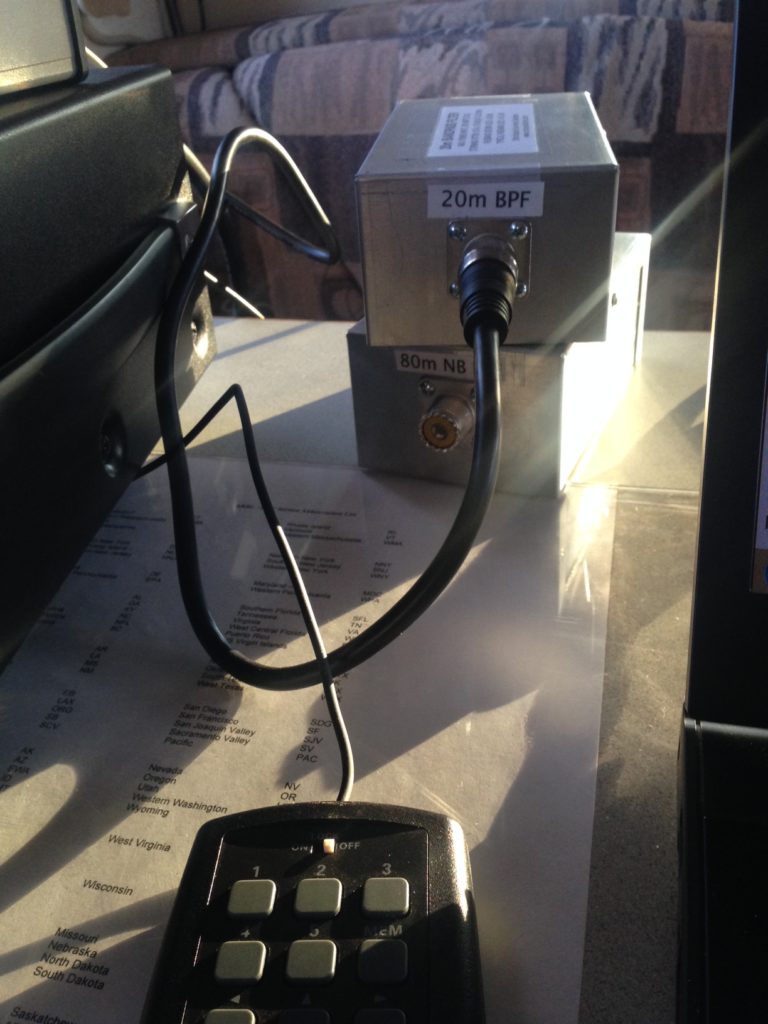
20m and 80m band pass filters at my station during sunrise on Sunday of Field Day
Solar Power
Our primary power source was solar power for the radios and generator to power lights and other various items.
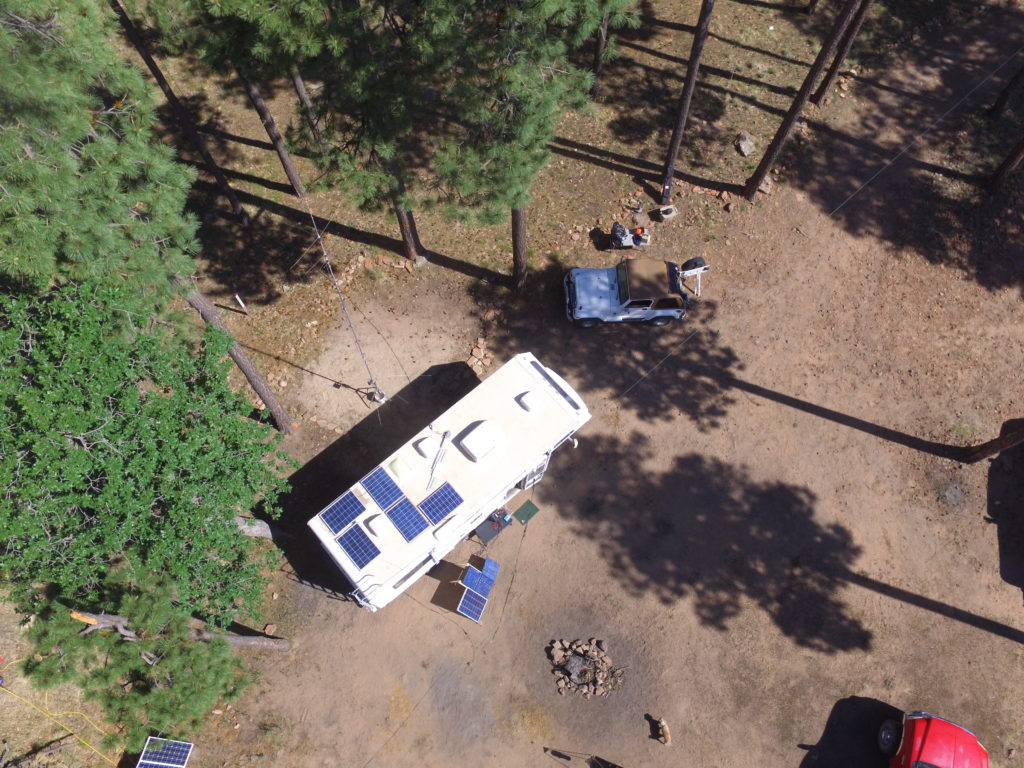
Drone footage of all the solar deployed at my RV during Field Day. All totaled, about 650 watts.
The solar on the roof of the RV (440 watts) was dedicated to power everything in the RV:
- lighting
- fridge
- CO2 detectors
- 12V fans
- the radio gear
I have about 210 AH of capacity with my two AGM batteries. I went with AGM for a couple of reasons:
1. Less maintenance
I am busy
I am forgetful
I am honest with my life
I don’t want to have to deal with battery watering and maintenance
AGMs, (Absorbed Glass Mat) allow for that lifestyle. I pay a premium for that ability, however, I do not have to dedicate nearly the amount of attention to wet cells. I have had this set of AGM batteries in my RV for about 6 years now and the are still rock solid.
2. Lower discharge rating. Most wet cell batteries found in RVs should never exceed a depth of discharge of 50%, at which point you damage the life of the batteries. AGMs on the other hand have a depth of discharge of 80%, so you can run loads on them longer. I have never taken mine down that low (usually only down around 30-40%) which is why I believe they are still working well despite their age with living in the extreme temps of Arizona.
Operating 19 out of the 24 hours and with everything else I needed power for I never got below 72% on the batteries, which included a freak rain storm that halted my sun generating power for about 2 hours in the middle of Saturday afternoon.
I made a point to bring most of the smaller solar panels I have as well, so I could use them to charge a car battery which ran the inverter to power my laptop in my RV. One thing I quickly discovered is that the inverter and the AC adapter for the laptop was a power hog combination on 12V. With the inverter running and the 120V latop power supply plugged in, it was close 8 amp drain, which I needed to run for 45-80 minutes to charge the laptop to 100%. During Field Day, I would run the laptop on battery power for about 4 hours, then connect the charger, take a quick stretch break, fill up on coffee and let charge the laptop for 30 – 40 minutes, then back on the air. I repeated the cycle 5 times during field day, with one long charge Sunday around 7 am local as I was down to 20% on the laptop and was in the middle of a good run and a pile of stations on 80 and 20 meters. I surely didn’t want to stop operating for such a foolish reason as to needing to charge my laptop!
This combination of three 30w panels and one 100 watt, (190W total) took care of the battery that powered the inverter and laptop charger without incident.
Why didn’t I run the laptop charger all the time the sun was out to keep the batteries at 100% you ask?
Great question!
Answer: NOISE! A ton of noise in the receiver was present when the laptop was charging. It was something I SHOULD have tested before FD.. oh well! (I think I have since remedied this issue with a pile of cores and torroids.)
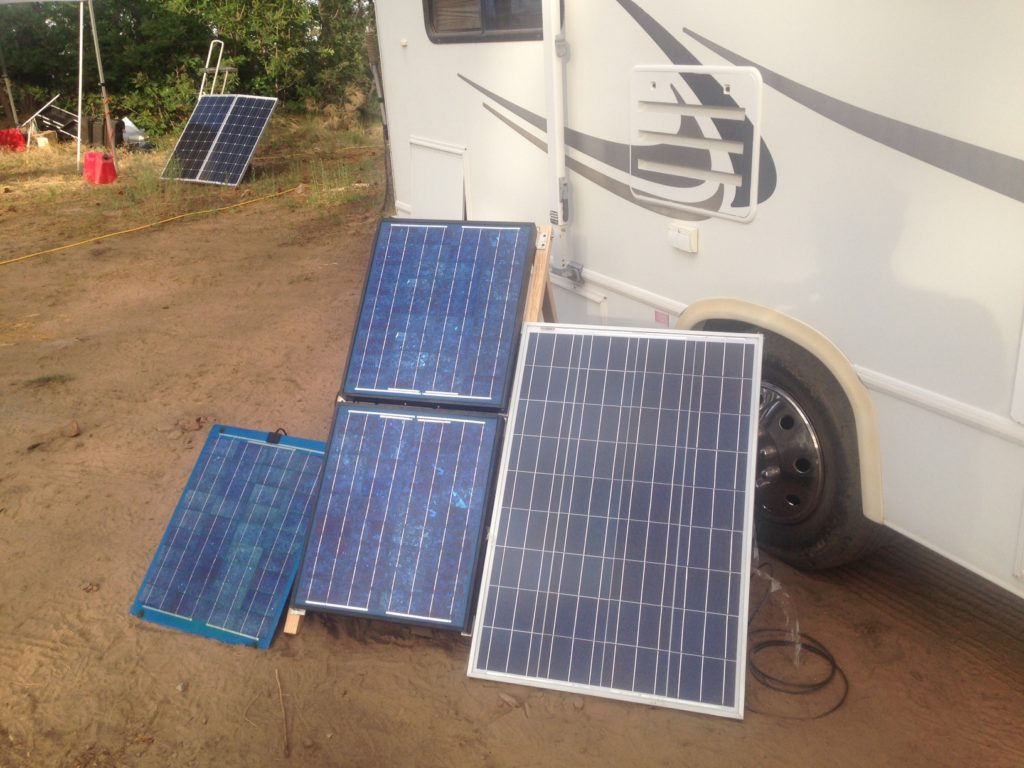
190W of portable smaller panels (with KF7RYX’s 200W ‘suitcase’ in the background)
I will do a longer post on the solar setup at some point. However, everything worked as it should. The flat mounted panels on the roof did a great job as well as the angled ground mounted panels. The nice thing about the flat mounted is that you do not have to mess with them. You suffer in that you do not get full power from the sun, but you never have to adjust them as long as they are out of the shade. Having them in the sun is all about how you park the RV. The portable panels, being angled, collect a greater amount of energy, but you have to do the “solar dance” every hour or so, to keep the panels orientated on the sun for maximum solar delivery. So there is a trade off there.
If you noticed in the picture you see different sized, style, design and wattage panels. Yes, you can mix and match different sized panels connected in parallel to deliver 12V at a higher amp/hr rating. However, you want to make sure they all have the same voltage. For instance, you can run a smaller 30W panel with an input of 18V with a 100W panel with an input of 21W. The tolerances are close enough. What you CANNOT do is run a 24V panel with a 12V panel and a 48V panel. This will cause issues. Stick to the same class (12V / 24/ 48) for all your panels and you will be fine.
Side note: If I was to do the RV solar system over again, I would have gone with two or three 48V larger wattage panels and let the charge controller handle the conversion to 12V. MORE amps from the sun, fewer panels, and I could run smaller cable. Compared to the current setup of two 100w panels and three 80w panels at 12V with 8 gauge wire connecting it all. I might even think about a MPPT controller if the coin was available.
Live and learn.
For the solar charger, the heart of the system that converts the 18-21W coming from the solar panels down to 13-14v for the batteries, I run MorningStar solar charges on both solar setups (RV and portable) and swear by them. RF quiet, no charging noise, and a great warranty on them. Yes, they are more expensive, but a US based quality product. Several members of the ham club run cheaper ebay controllers from overseas, that are NOT RF quiet and you can hear them in your radios. Not fun when you are trying to work stations and you have to dodge the noise from your power source.
Dave (KG7NCV) and Michelle (KG7NCW) founders of the Mesa-R U Prepared group, along with Dennis (KF7RYX) both had 200W of solar deployed, so for the entire N7Q operating site we had over 1KW of power being generated completely via the sun. That is 50 amps per hour for 5-6 hours of peak sun! That is super cool.
Radio Equipment
Dennis brought his standard “Go boxes” for one of the stations, with a Yaesu FT-991, while I ran the Yaesu FTDX1200, a suggestion from my ham friend Steve, KD1O. (If you click on the link and scroll down his QRZ bio, you will see a shot of us both during a break in the action of operating as W1AW/1 in 2014.)
The FT-DX1200 is a great rig, with some nice filtering options, and paired with the additional remote voice or incremental CW keyer makes for a nice radio to “contest” with. Add the Heil Pro Plus! headset, a full mug of coffee, a coax barrel connector (for tuning the antenna after I take out the band pass filter) and the N3FJP logging software, I was good to go!
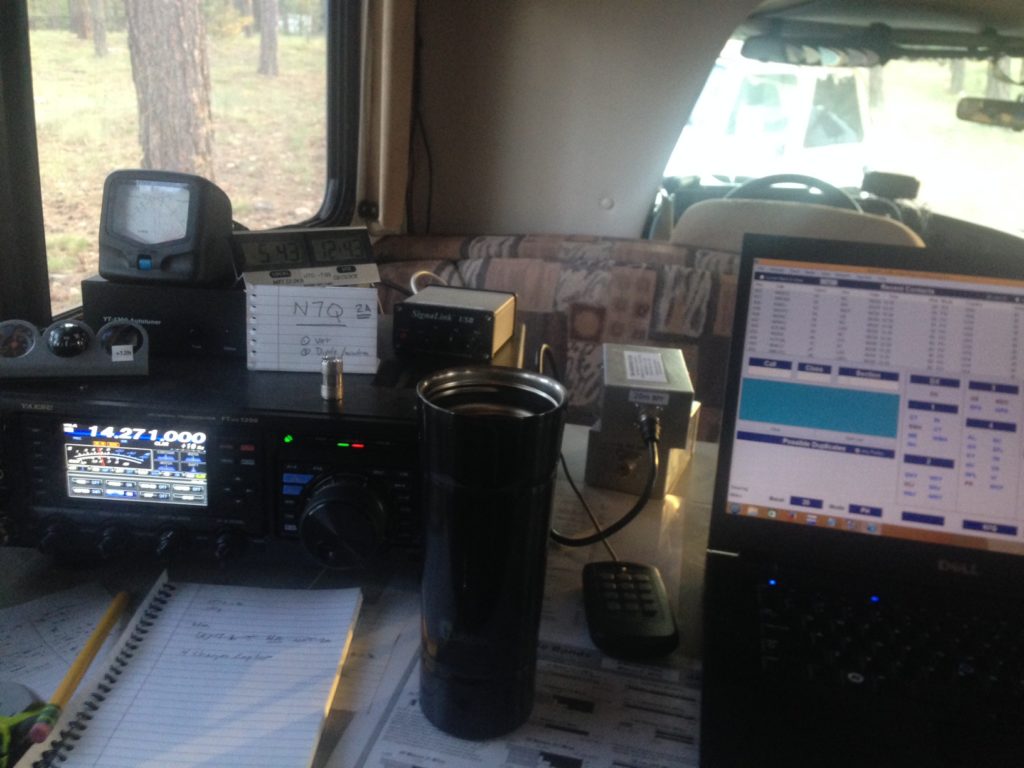
N7Q 20m & 80m station
For the weekend I setup in the motorhome on the dining table / booth and ended up staying on 20 meters for a majority of the event, with a few hours on 80m (2:30-5:30 AM local) in the pre-dawn hours after everyone else operation from the tent had gone to bed. I quickly discovered that I need to upgrade the foam in those cushions if I am going to be sitting on them again for 6+ hours straight at a time!
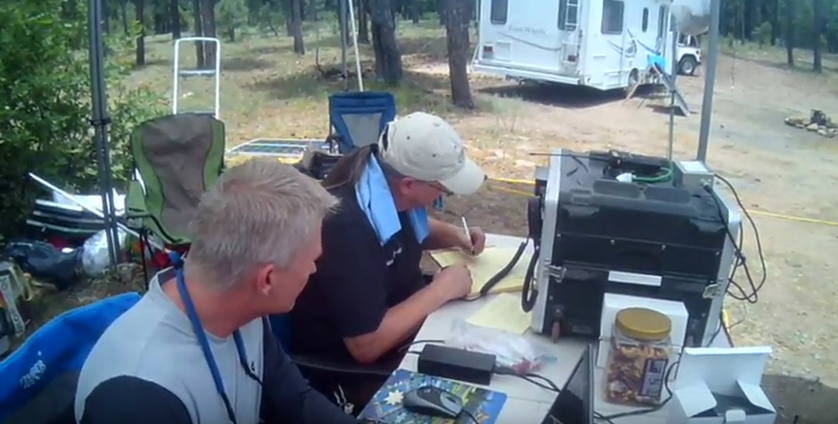
Greg and Dave working 40 Meters from the tent and Go box.
Out in the tent, Greg, Dave, Michelle and Dennis swapped off on the other station of our 2A setup. Trading off logging and working the mic. Note the sweet tub of mixed nuts as quick grab food next to the go box.
This picture was before the rains came and forced an emergency “upgrade” to the shelter with walls and support beams to keep the water from collecting in the top tarp.
Antennas
The antennas I used were a Hygain AV640 vertical as well as an NI4L OCF dipole. The vertical was tuned well on 10/20/40m, but was picking up a lot of noise from local generators as well as quads and motorbikes from other campers in the general area.
Hygain AV640 next to the RV with cement bucket + tripod + pole mount.
With plenty of trees in the 40 – 60′ height, we were able to pick and choose which ones we wanted to sling the lines up and over to get the antenna orientation we were looking for.
The OCF dipole was great on 80/40 without the need of a tuner. 20M was flat from 14.400 – 14.550 (1.2/1 SWR) but needed the tuner to bring it into the 20m band. I was very happy with the performance of the OCF, and I created a fairly large pileup with it on 80m, with several folks saying I was the loudest signal on the band at that time of the day. A good thing during Field Day! While 20m never went “long” to the east cost, or even DX stations, I was able to work a pile of West coast and Central stations with the OCF. It was a solid performer.
Dennis erected a G5RV variant, the ZS6BKW multi-band antenna @ 55′ feet and had good luck with that antenna. I wanted to run something without a tuner, so I elected for the OCF dipole and the vertical. Aside for the strange SWR on 20, both antennas worked as expected.
Hunt and Pounce or Hold the Frequency
Dave, Dennis, Michelle and Greg did a lot of HP (Hunt and Pounce) on the station that they were running. I am not a big fan of that method. I much prefer when I am “contesting” to find and try and hold a frequency. These are two completely different operating styles. One, you search the band for a strong signal, then compete with countless others to try and work the station that is on the other end. In some cases, you might get them on the first try. Other times, it might take 20 minutes to work the station. This method of operating needs to develop some parameters on how it will work – as in, when do you move to the next frequency, how strong does a station have to be in order to try and work them? You need to think about these questions or you might catch yourself trying to work the same station for 20 minutes.
HtF (Hold the Frequency) method (Yes, I just came up with that descriptor) is where you find an “open” frequency and call CQ, having the stations come to you. If you have a voice keyer and know how to use it.. this is the best situation. However, this method of operating requires a few things.
- High tolerance to QRM
There will be a LOT of it. 99% is unintentional. 1% will always be intentional, which is too bad, but that is why we have that button on the radio called “Notch”. 😉 You will also find that due to the band opening, there might be two of you on the same frequency, you just can’t hear the other station due to his/her location and how the band is operating. So, you need to be sure that stations are answering YOUR calls, and not someone else on the same frequency. - Good headphones or a quiet environment
You need to be able to pull stations out of the QRM to work them. In order to do that, you need headphones to make it happen. Some stations will be S9+40, others will be S2. In order to hear both, a quiet environment and a good set of cans make all the difference in the world. - Listening skills
A lot of folks get sucked into “pushing the button” on the voice keyer, and not listening for a response. You have to listen for the stations that are trying to call you back, not just listen to you own voice in the voice keyer calling CQ. - A plan
When do I change bands? When do I change antenna? How many “again.. again” attempts do you give the weaker stations before moving on? When is greyline on the band you are on? When do you sleep / rest?
All part of the master plan. Have one, and work it. - Flexibility
Field Day to me is all about two things.
A) Bringing your gear out in the field and operating
B) Bringing the experience of what a packed HF band sounds like to new hams, or soon to be hams, or kids in a fun and welcoming environment. It is about participation, whether it be 24 hours, 12 hours or 1.2 hours. It is about the excitement of making that first contact at 8 years old with someone in another state or another country.
Having said all of that, you have to be flexible in how you operate during Field Day. You might have to slow down or speed up depending on who is on the other end of the conversation. If you are in CQ CQ N7Q.. 2A, AZ, 73.. CQ CQ..mode, and a new ham is calling you, do everyone a favor and S L O W down.Take the time to work them, say “Hello, thanks for the qso, hope you have a great Field Day! at some point during the conversation. Repeat their call. Let them be fully aware that you are talking to them. Make the moment memorable and exciting for that new ham or child on the other end of the mic. Drawn them in to the hobby, don’t scare them away with ultra fast contest speak that they do not understand (yet). Even if it breaks up a run that I have going on – during Field Day I always take time to slow down and welcome the younger stations into the mix. Trust me, it will pay dividend in the long run!
N7Q Results
The end results for N7Q were:
120ish Qs on 80m PHONE
380ish Qs on 40m PHONE
711 Qs on 20m PHONE
8 Qs on 20m DIG
0 on CW. (NEED TO ADDRESS THIS <—-)
All in all we had a great time.
Next year the addition of a few good CW ops would really put our club high on the rankings, due to the 2 for 1 point value of digital and CW contacts. Think of it this way 181 CW contacts would have outscored the 380 voice contacts. Something for us to really think about, or even look to move to 3A and have a dedicated CW station. Regardless, we have about 350 days left until FD 2017! I know I have some small improvements to make to my station (band pass switching, antenna adjustments, grounding, power management, EMI filtering on the laptop charger and inverter..)
N7Q Special Event Call
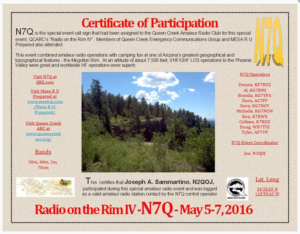
Remember, if you logged a QSO with N7Q and would like to receive a Special Event Certificate, just send an email with your request containing call sign, date, time, and frequency of QSO, to Joe, N2QOJ at jsammartino@gmail.com.
A PDF version of the certificate will be sent to you once the QSO is verified.
It will look something like this:
If you worked N7Q on 20m or 80m, you were talking to me. Thanks for the patience, especially around 4 -6 am Sunday morning as I was quite ‘punchy’ and my coffee IV was empty.
If you want to see some great drone footage of our location, here is the youtube link from Dennis. He did a great job piloting the drone and capturing the footage (as well as some of the still shots here on this page). What a great location.
https://www.youtube.com/watch?v=8V4JiCfHS_8&feature=youtu.be
73 all de N1RWY Nancy ONE Red White Yellow _ . _ _ . _
2 Pingbacks