
One of the things I wanted when I had my new shack built was a proper entrance panel for all the rotor, coax and other cables into the shack. At the same time I wanted to add lighting arrestor gear for all the cables. Here in the desert of Arizona as we get a TON of lighting here during monsoon season as well as any other time due to the weather rolling off the mountains. Since my tower and antennas are one of the highest things around my area, I needed to make sure I took the time work on grounding as well as lightning protection. I FULLY realize that nothing will survive a direct strike, but any help I can provide with indirect strike surges is worth the effort!
I asked around to some local hams as well as some internet research, and many agreed that a professional system that looked good and worked well was the stuff made and sold by KF7P.
A quick call to Chris and he squared me away with all the gear that I needed based upon my requirements, various lighting arrestors for coax and rotor boxes, plus a nice XL Entrance Panel (with my choice of color) to to bring it all into the shack. Well build, solid and looks good! I highly recommend buying from Chris, he carries some great products on his site.
Due to the cooler weather, I finally had some time to mount all the arrestors and get them wired up.
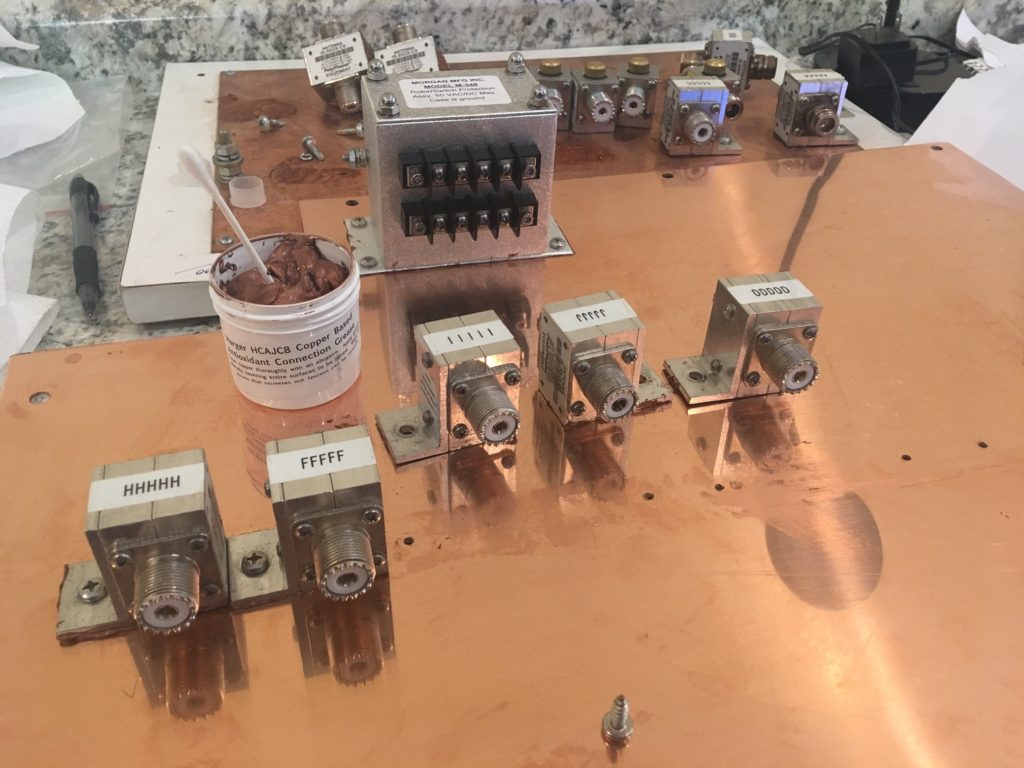
Mapping the layout to mount all the hardware on the copper plate.
I made a point to make sure I used plenty of the copper paste to aid in the connection from the lighting arrestor to the copper back plate.
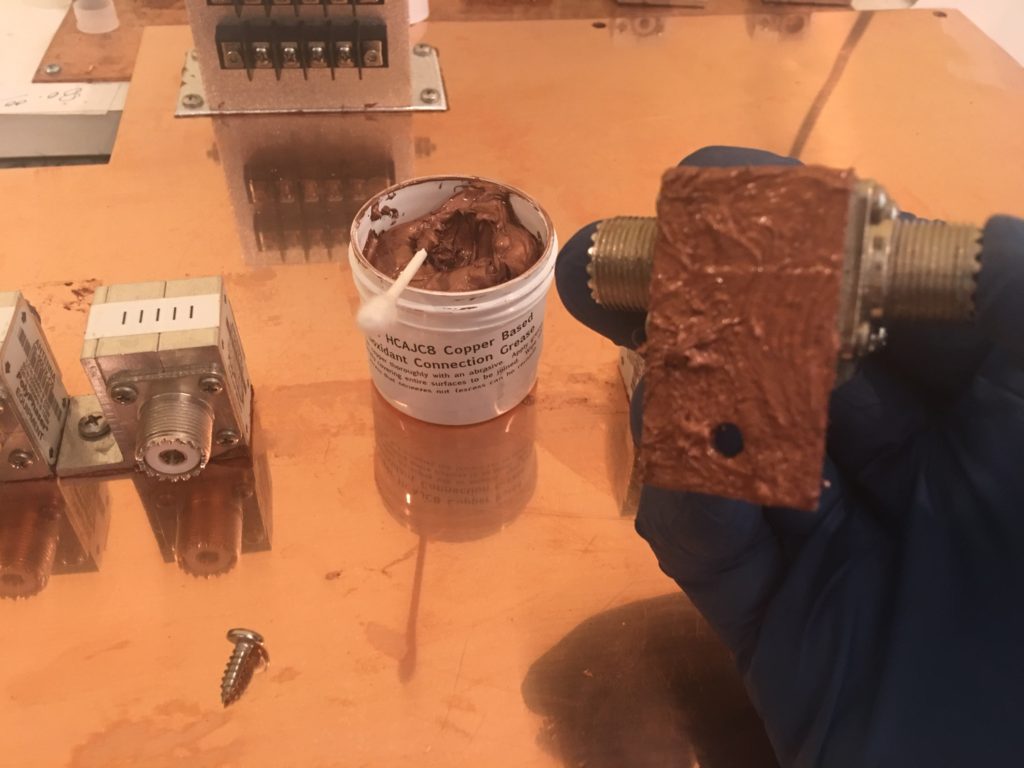
Adding the copper paste to the bottom of the arrestor before mounting
After a few back and forth to the panel box, all the items were mounted and ready for connections. I have a sneaky feeling that the 3″ cable opening is going to end up being too small, or I will have to feed the cables through, THEN put ends on them. 😉
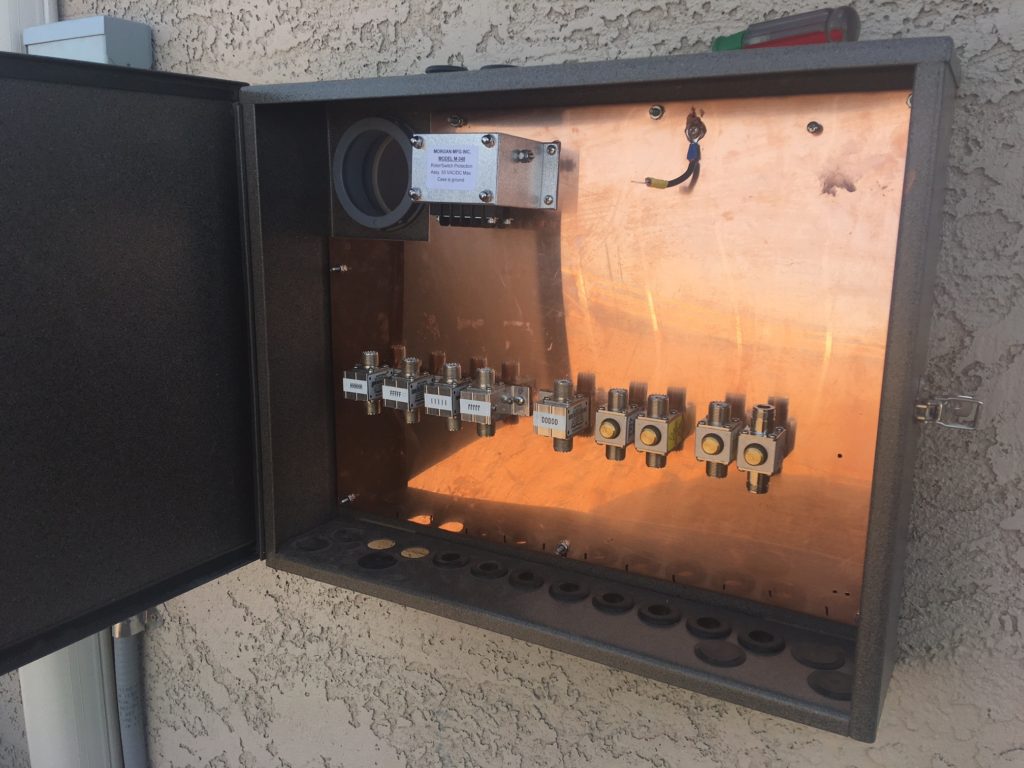
Everything mounted, ready for cables.
About an hour later, the grounding cables from inside the shack copper bus was mounted to the panel, as well as the panel mounted to to some copper braid and then to the 8′ ground rod that is mounted directly under the box. Cables for the two rotors were split, and then added to the various arrestors then run to the shack. Coax into the box and then into the shack were run as well.
Completed install (more antennas to hang before the box will be full) but with room for 2 more HF coax cables, the 6M beam, 144 MHz beam, 432 EME feed and 1296 EME feed.

All cables run and secured – now I need to get more antennas in the air to fill up the box!
Another good aid that aided in this project is the ARRL publication:
Grounding and Bonding for the Radio Amateur
It is an easy read and a great reference for any ham who wants to make sure their shack is grounded as well as it can be. Highly recommended.
Cathryn Mataga (ke6i) October 21, 2019
Nice page. I’m trying to plan out my lightning arrestors and your pictures are useful.
n1rwy October 22, 2019 — Post Author
Thanks for the comments. I have some additional work to do this winter. More antennas more bands!