
Back in Maine (Grid FN54) in the early 2000’s I was on 144MHz EME with H frame of Cushcraft 13B2 antennas. I fed it with a pair of 4CX250B tubes (400W) and had some basic success running stations on 2 meter EME. I used a linear actuator and a home-brew N1BUG 28V power supply with a linear pot and weight to read the angle of elevation. It was rough, but it worked. The system wasn’t perfect, but I could work the real big guns on CW. The Cushcraft 13B2s were not “the best” choice for EME as the gain figures are bit low, but they were cheap and easy to work with. I think I spent a total of $150 for all 4 antennas (various hamfest deals).
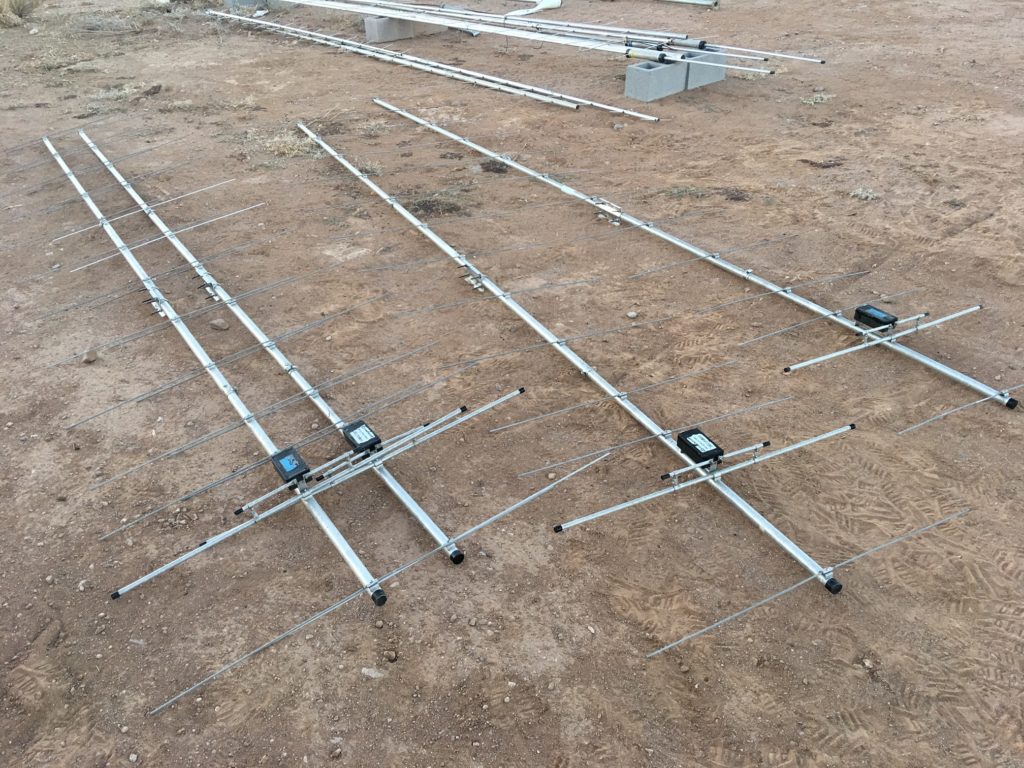
Antennas all tuned, sealed up and ready to go!
After a few years I ended up being QRT on EME due to blowing up the amplifier running too much power on high speed meteor scatter, loosing control of the linear actuator, loosing the camera used in aiming and the fact that all of the repairs were 30′ up on the tower (in the middle of winter) kept me from fixing them. The following summer I took it all down and stored it away.
Flash forward several years (almost two decades) and I found myself in Arizona, longing for the exhilarating moments during an EME QSO. Hearing that raspy sound of the EME tones is quite amazing when you realize that the signal is coming from earth, bouncing off the moon, and then coming back down to earth, where you are able to hear / decode it 2 seconds later… Very cool.
Here in Arizona, I have zero tree cover to deal with, and a great horizon view on moon rise and set. (Yes, that full horizon to horizon range of visibility was one of the reasons I choose this house) I talked to my friends back in Maine who had been storing my stuff, and shipped the antennas out here to AZ. With the morning Arizona temps now in the low 40’s, it was the perfect TIME to get the array up in the air here in the desert.
Tower
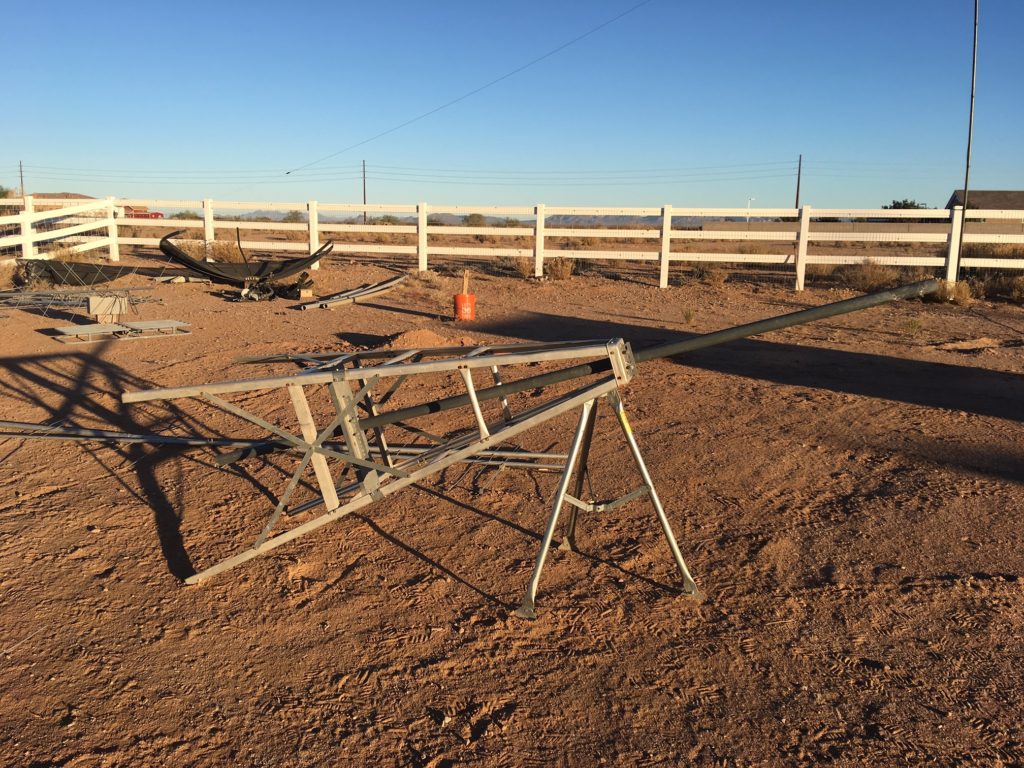
The first thing I had to do is get a suitable tower for the H-Frame setup. I had thought of using a couple 10′ sections of Rohn 25G to get it up in the air, but then all the work would have to be while hanging off the tower, and to be honest, it was overkill for what I was trying to do.
I ended up going with a smaller “roof top” / “garden” tower that was 7′ tall. The fellow I bought it from was planning on using it with some long cross polarity yagis for satellite work. I figured it would work just fine for my small array. At the same time I was able to score a Yaesu G-5500 rotor for a great price which would be a great upgrade from the linear actuator as far as monitoring and easy of use. Yeah, I could lift up a car with the old actuator, but I didn’t need it for this project, and it would allow me to save it for the 1296 MHz EME dish project, that I want to complete before summer gets here. (I should be able to start it in Feb/ March 2018).
Small, lightweight tower for the small array
The other day with the help of Dave, AC7FF, I was able to get the rotor mounted to the tower and the cross beam installed.
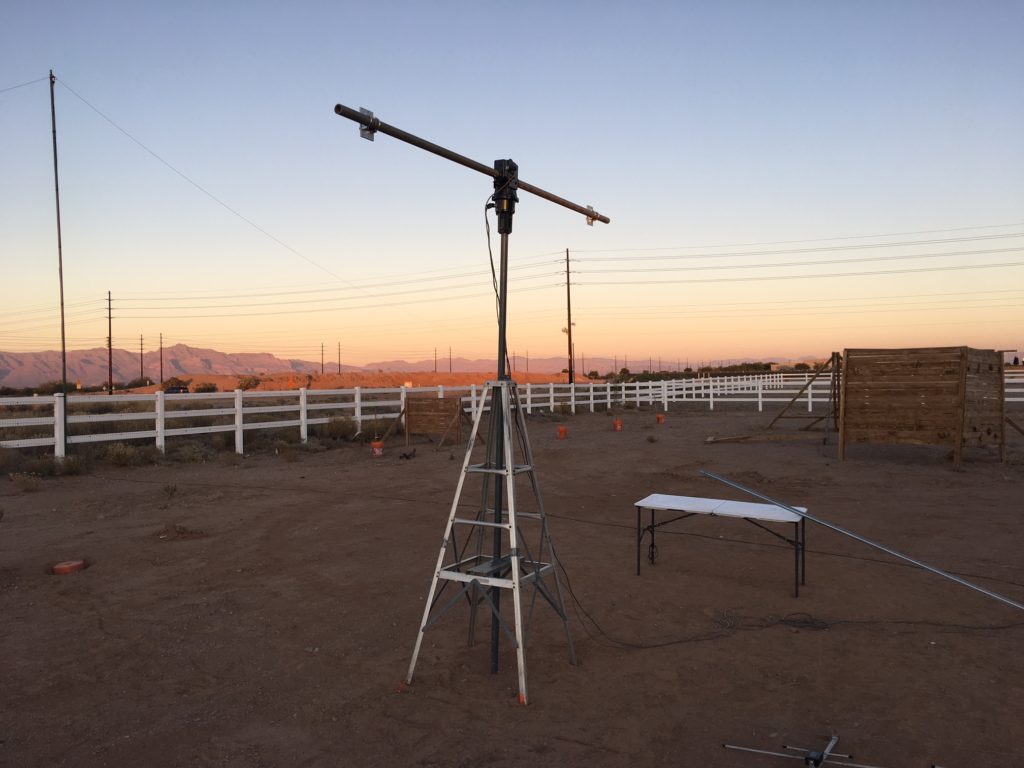
Tower, rotor and cross-boom installed – I am facing east towards moon rise, the rotor is facing north)
Once that was up, it was a matter of getting the antennas attached to the H frame and then installed on the crossbeam. I was using a fiberglass 2″ crossbeam and 1.5″ vertical risers for the “frame” of the H-Frame array. For this I went with the M2 B.T.M 4×6″ plates. Based upon their recommendations, I doubled up on the plates to make them thicker to support any twisting or turning. Using the M2 bolt package guaranteed that they fit the plates and I was not going to find any surprises when I was hoisting these into place and clamping them all down.
Punch List
Another great advantage of the ground based system is I was able to get all the antennas on the vertical risers and clamped to the H-Frame by myself. Another 6 or so hours later I had the punch list completed:
- Phasing lines cut for each antenna
- Crimp connectors from The RF Connection added to each end of the cables, N for the power divider, UHF for antenna side
- All antenna connections taped and then sealed with the self sticking rain tape
- Antennas clamped to the vertical risers
- Vertical risers clamped to the cross boom
- North, East and West, adjusted with compass for accurate tracking
- Rotor cables run and terminated with connectors for the Polyphaser and Morgan Manufacturing rotor lightning arrestor boxes
- 40′ length of LMR-400 run to the KF7P shack entry panel box and Alpha Delta lighting arrestor rated for high power on 144 MHz (Full blog post on the Entrance Panel box here)
- Crimp connectors added to the feed cable
- All cables tested for length and rotor “pinch”
All antennas mounted and cable run!
Connecting all of the antennas together I used the M2 4 port power divider, and sealed and taped all the connections there as well.
A quick SWR reading made me quite happy with what I on the antenna analyzer.
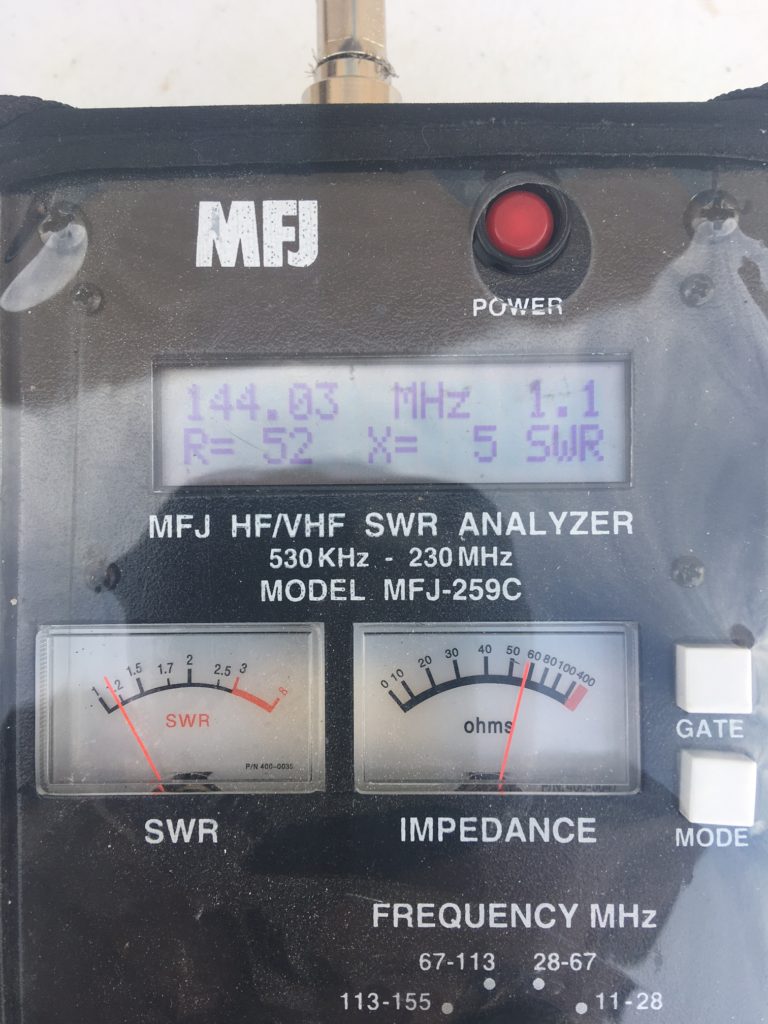
Nice flat SWR, I will take THAT!
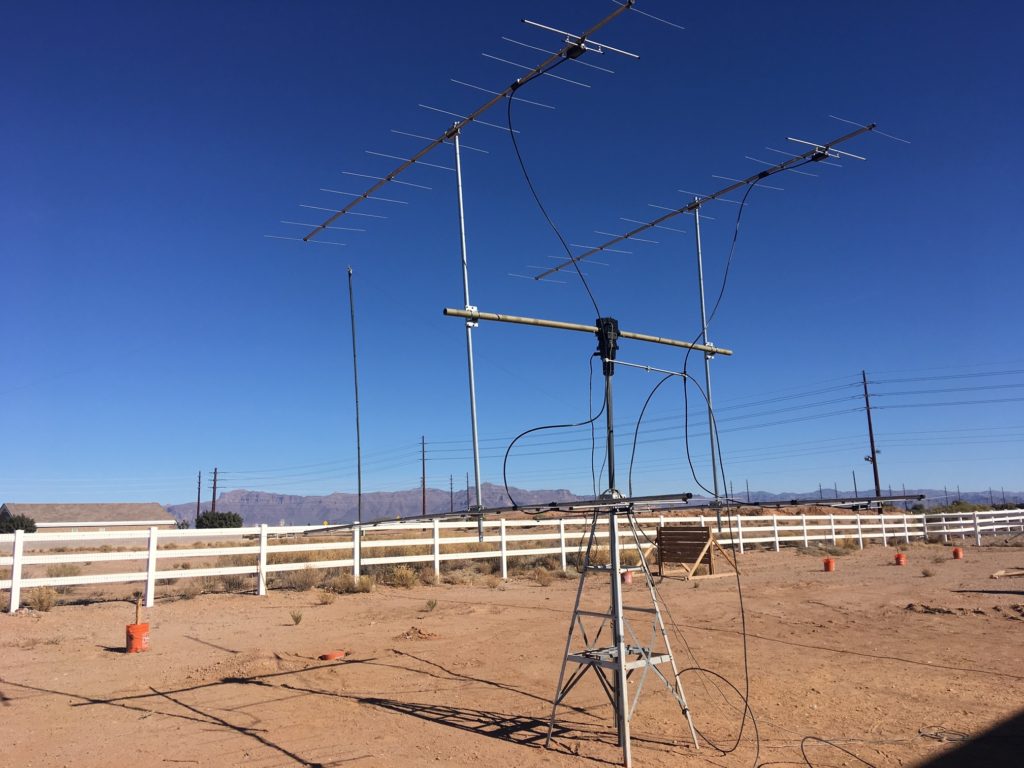
Awesome progress to date. The antenna moves as it should, SWR is flat, and everything is stable.
Part II List
At this point I need to move forward on the rest of the list over the next few days/week.
- Sequencer
- Relay install
- Pre-amp(s) install
- Power amp install (Larcan -VO1KS modified)
- Power amp HV supply modification (HP Blade Server power supply)
- Software install
More progress coming soon, and then back to working stations on EME!
O.C. April 13, 2020
looks great!!! i happened to be in your area and saw the setup from the road, looks awesome!
N1AV April 14, 2020 — Post Author
Thanks –
For what it is, it works great.
This is the old array, I am working on an update for it now. 4x20XP M2 and 1500W PQL. Should give me about 6db more on TX/RX.
Andy June 6, 2018
That thing is a beast!