This is going to be the fist of many 1296 EME blog posts, as I RACE to get this dish completed and on the air for the 1.2 GHz DUBUS EME contest in April of 2018. It it about 2 months away, and while this is going to be difficult, I think I can get it done it time, at least to a point where I can make QSOs on 1296 EME.
So, there is a pile of things to do, and I should go in some logical order, however, that is not me. I am not a A to B to C person… Rather, start at F.. cover G-H-I jump to W.. then back to A-F. So – having said that, I am currently trying to get my head around the mount that came with the dish and how to make changes to it so I can both ELEVATE the dish (which I think is covered) and ROTATE the dish with azimuth changes so I can track the moon. I know once I get this ‘visual’ in my mind of how to do it, it will allow me to focus on other aspects of the build that needs my attention.
I have been able to apply voltage to the motor that is on the mount and it does move in one direction.. I have not found out how to get it to move the other direction.. yet.
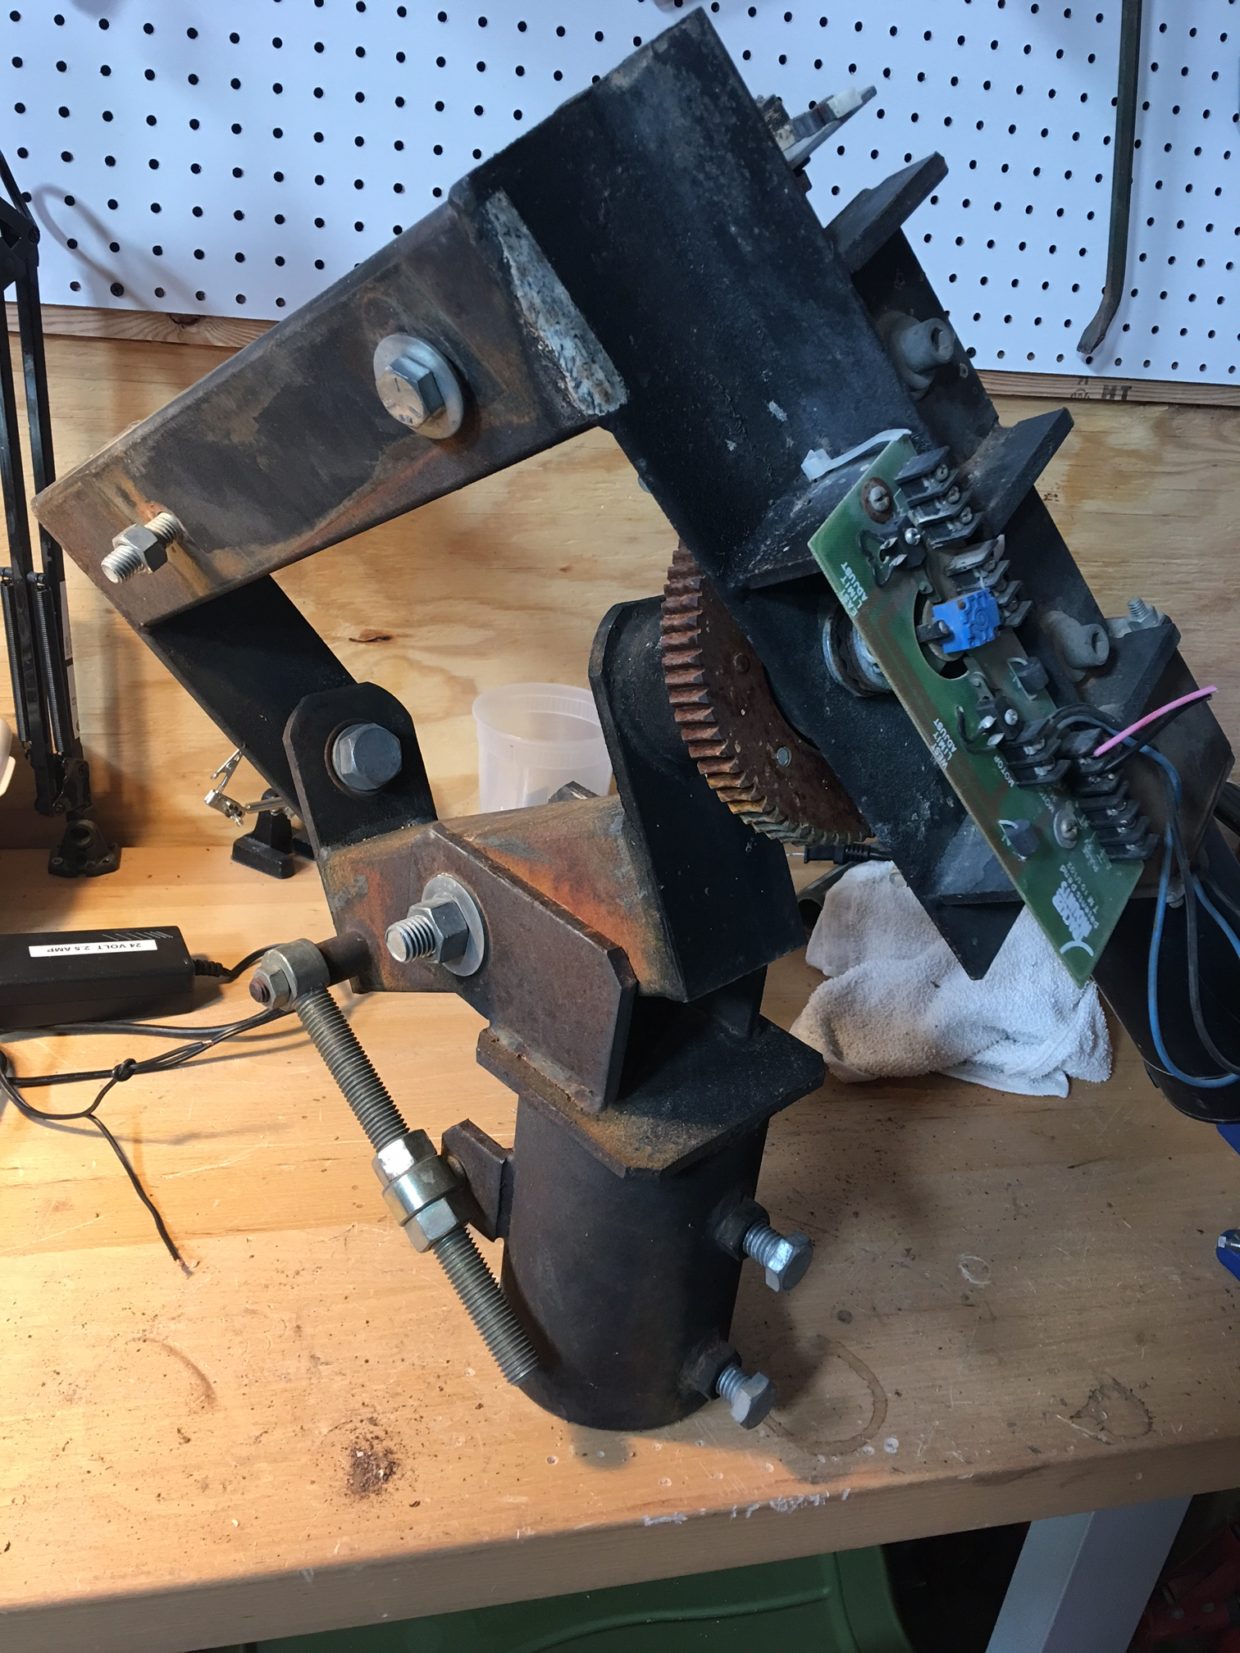
Images of the mount:

As you can see, the bottom of the mount locks on to a 4″ OD pipe with the two bolts.
The, what I have been told is the hour angle adjustment is controlled by the motor (not in the pic) that is attached to the mount under the circuit board. It allows the top of the mount to “flop” to the left and the right when I apply voltage to the circuit board + and – terminals. This does not correspond directly to elevation, as we are talking a polar mount. So some math as well as look up tables will be needed here.
Looking at the circuit board there are limit switches that are set to stop the dish at both ends of the E-W arc, with them being set to what looks to be about 15-20 degrees off the horizon, so the arc would travel from E to W starting at 20 degrees, up through 90 degrees (straight up) to end 20 degrees above the horizon to the west. It appears that there is some room as well to “widen” out this arc so I could go from moon rise to almost moon set. See the image below.

In the above pic you can see the limit switches to the left and right of the back of the arc. The motor is rated for 36V, but turns just fine at 12V, which is what I would be running it from to keep the movements nice and slow and easy to turn. At the moment I am able to apply voltage (+12 on red, – on black) and the rotor turns one way. Switching the + and – on terminal does not make the motor reverse. However, switching the voltage on the motor terminal itself does allow for the arm to swing in both directions.
If I do this, I just forgo all of the limit switching of the control board – and will have to come up with my own control design (most likely momentary switches so I don’t flip something on, get distracted and end up crushing something as the dish hits a hard stop..)
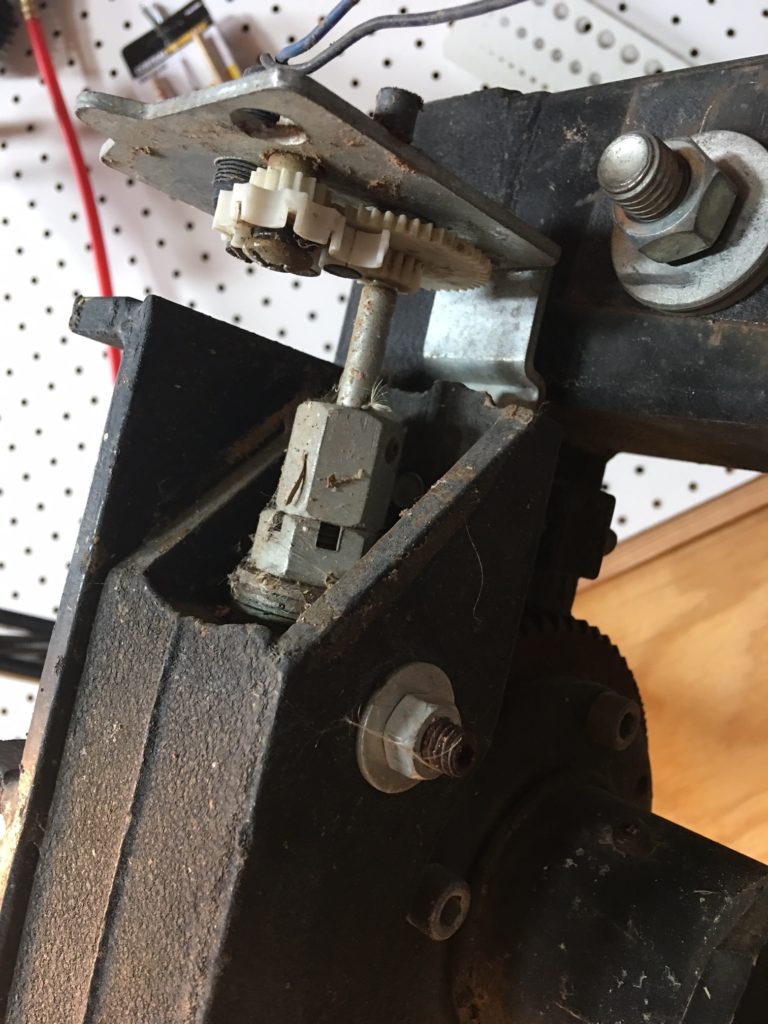
In the picture above, at the top of the motor mount there is a shaft and gear cog. That is mated to a wheel cog that -had- several magnets in it, which I think was used for measuring pulses to tell me how far the motor has moved. This will have to be replaced or hacked or fixed.
So, from what I can tell for quick observation and some minor testing.
- The rotor works… man I love living in the desert vs back east.
- The rotor should allow for almost full 180 adjustment of the dish, once I figure out how to get it to turn the other direction.
I am still up for suggestions on what I need to do in order to move the dish on the azimuth plane.
Update:
Looking at VE2ZAZ‘s site, and what he did with his polar mount, I think I could do something similar with mine. Remove the lower bar on the left, and replace with a linear actuator. This would control “elevation”, the motor already on the mount would control azimuth (or ‘rotation’). I might have to make some minor adjustments to the mount in order for it to work all the way down to moon rise do to the mount running into each other. However, with the aid of a camera, this would allow me to get on the moon with rough az/el control.
Here is a comparison of his finished mount, and what mine looks like right now.
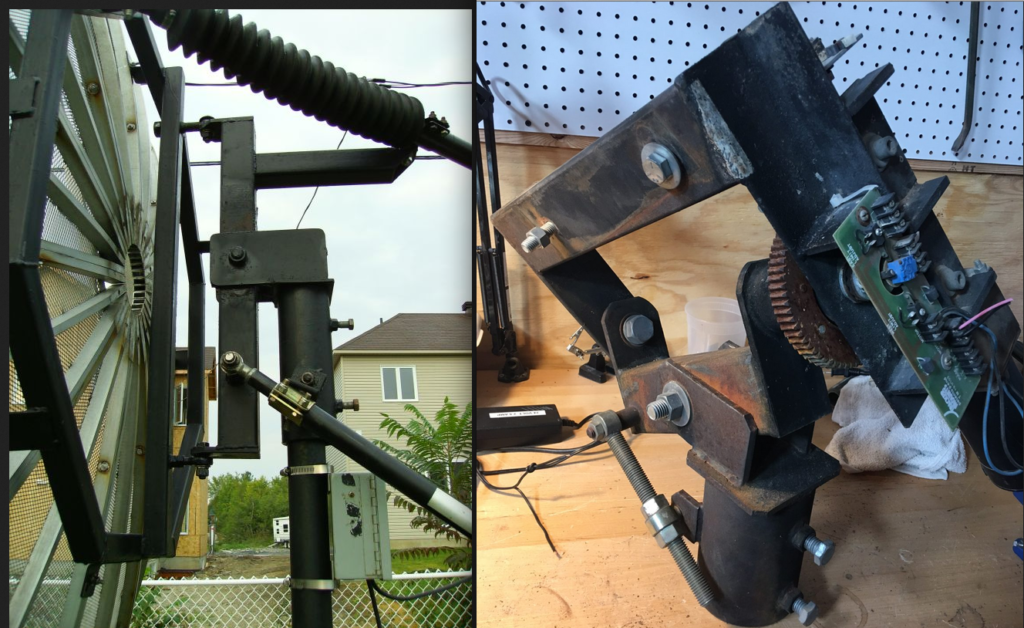
He uses an actuator to move the “azimuth” I could use the motor attached to mine to do the same thing. His “elevation” is controlled via the lower actuator, which I could put in place of the long screw on the lower left. I am thinking with a camera mounted on the dish for aiming and some look up tables.. this could work – however, it would be manual adjustments that I would have to keep up with.
I have removed to the bottom threaded bolt as seen in the picture above, which allowed me to see how far the mount would be able to be adjusted. With the screw arm removed, I get about 14.5 degrees at the lowest point (to where the mount binds against itself) to 90 degrees, to where the mount binds against itself again.
So.. If I did go this route, and replaced the threaded bolt with a actuator, My lowest starting position would be roughly 15 degrees off the horizon, and I would have the ability to reach the highest point of the moon arc as it went overhead in the sky during its rotation. This would give me:
Starting position: 15 degrees of moon rise in the East. (+- beam width)
Ending position: 15 degrees of moon set left in the West. (+- beam width)
Not perfect, but not bad either.
Barry, VE4MA – had suggested that I could keep this as a polar mount, however, would have to add a second hinge and a jack screw to adjust for declination, as described in this pdf. Backyard 1296 EME.. What they didn’t tell me – NTMS.
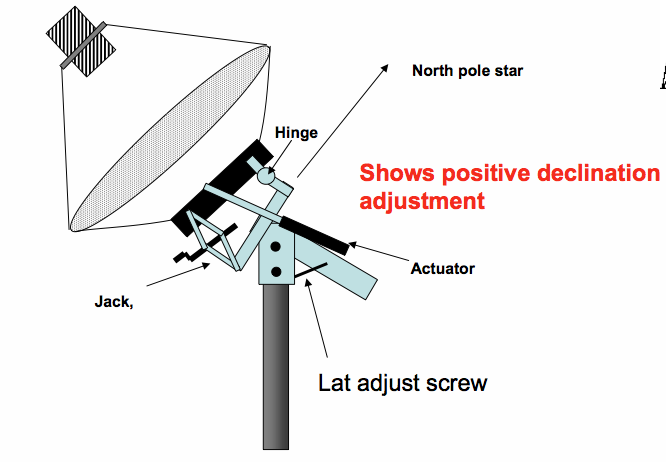
(image taken from the article linked above)
If I did this, however, I would need to make sure the jack screw will work on the pivot of the arc angle adjustment, and I would need to hack to the top of the mount (by the motor attachment) and add a hinge. A fair amount of metal work.
Decisions.. decisions..
If you have any information on this mount, or manual for the tracker board, please feel free to comment below.
A lot more to come soon!